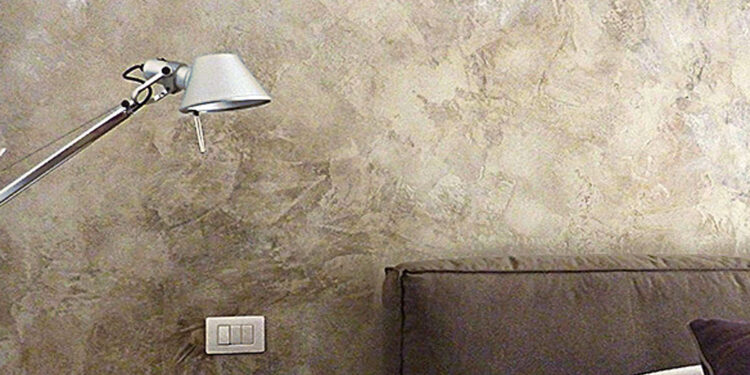
Are you looking for a way to add some luxurious flair to your walls? Venetian plastering is an age-old decorative painting technique that can turn any wall into a piece of art. With its signature glossy look and unique texture, it is no wonder why Venetian plastering has become so popular in recent years.
In this article, we will discuss the basics of Venetian plastering and give you some tips on how to achieve the perfect finish for your home or office space. Whether youre just starting out or already have experience with this technique, our guide will help make sure your project turns out beautiful and long-lasting.
So let’s get started!
What is Venetian Plastering?
Venetian plastering is a centuries-old technique used to create luxurious wall finishes. The process involves applying thin layers of plaster in a cross-hatching pattern and then burnishing the surface with specialized tools for an ultra-smooth finish.
The result can be anything from glossy, marble-like surfaces to textured matte walls that look like velvet. Venetian plasters are often tinted or colored for added visual interest and come in various textures, allowing homeowners to customize their space according to their particular tastes. It’s important to ensure the application is done correctly as incorrect techniques can lead to uneven or bubbly results.
Professional contractors are highly recommended when attempting this type of project due to its complexity and time sensitivity; however, DIYers may find success if they take the necessary precautions and research best practices beforehand.
Preparation for Applying Venetian Plaster
 Preparation for applying Venetian plaster is a critical factor in achieving luxurious wall finishes.
To ensure your walls are ready for the application process, it is important to thoroughly clean and repair any damaged surfaces before plastering. Start by wiping down the surface with a damp cloth or sponge and follow up with an appropriate cleaner if needed.
If there are any holes, cracks, or other damage on the walls that need to be filled before plastering can begin, use a spackling compound as necessary. Sanding may also be required depending on how much patchwork needs done and what kind of finish you desire.
Once all repairs have been made and you are satisfied with the look of the substrate, seal it using either an oil-based primer or shellac-based sealer; this will help create a more consistent topcoat when finished. Now your walls are primed and ready for Venetian plaster application!
Applying the Base Coat of Venetian Plaster
Applying the base coat of Venetian plaster is a critical step in achieving luxurious wall finishes. It requires precision, attention to detail, and patience to achieve an even finish that will last for years.
Before beginning the process, it’s important to ensure that all surfaces are clean and free from any dust or debris. Once ready, begin by mixing your chosen plaster with water until it reaches the desired consistency. Then use a broad brush or trowel to apply the mixture onto the surface in even strokes – start at one corner and work outwards.
Make sure not to overwork any area as this can cause dips and unevenness in your final finish. The base coat should be left alone for 24 hours before adding additional coats of plaster if desired.
With careful application, you’ll have beautiful walls with a timeless style!
Conclusion

Venetian plastering is a popular way to add luxurious finishes to any wall. It has an elegant, unique texture that sets it apart from traditional paint or wallpaper options.
Platinum 3 Venetian Plastering offers the highest quality of professional services and products for creating stunning wall finishes. With their expertise and experience, you can trust that your walls will look beautiful and last for years to come.
When choosing a Venetian plaster product, make sure you select one with high-quality ingredients for maximum performance and longevity. With these tips in mind, you’ll be on your way to achieving the luxurious wall finish of your dreams!


